A flat PVC rail is cheap, easy to build, and absolutely great for learning. Everyone with a backyard setup usually starts with one of these, then evolves to kinks, elbows, drops, and even curved rails. Let’s walk through building a 12-foot flat rail.
Always use the proper tools and protection, not necessarily what is depicted here.
We assume you have power tools, including a drill bit to clear the screws through the PVC. If you don’t, pursue a different design. There are some great ideas in the Newschoolers Build-A-Jib cult.
PARTS
We ran to Menard’s and picked up a pile of boards, screws, and pipe, but this is a shorter list of what you’ll use:
- 1 6-foot PVC pipe, 4-inch diameter.
- 3 12-foot 2×4 boards.
- 1 box of 2 1/2-inch screws
- 1 box of 1-inch screws
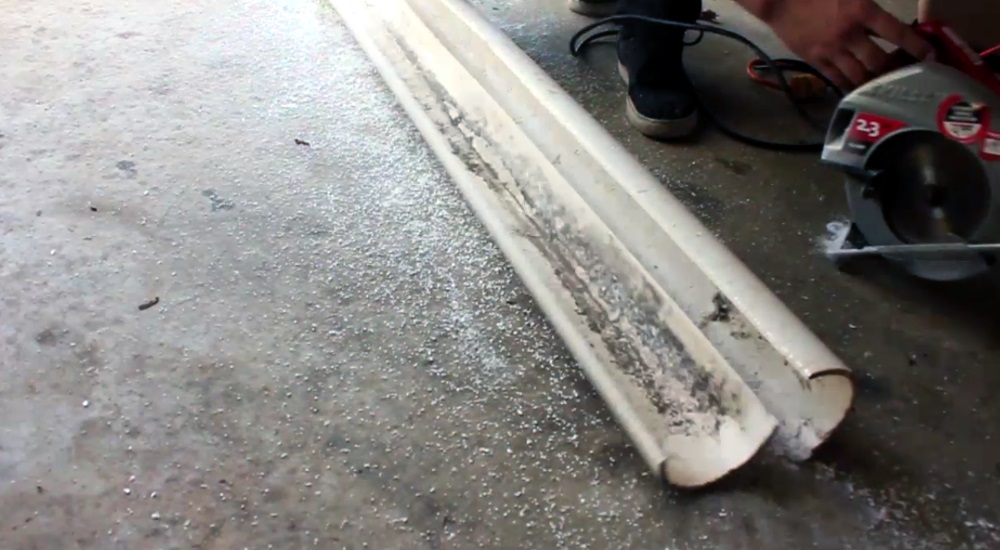
Rip the pipe down the length of it to get two 6-foot halfpipes. This is a neat way to double the length, and it’s easier to attach to the frame later. This is my favorite circular saw, by the way. A friend of mine left his outside, plugged in, every day for a year and it still works. Amazing.
We used the lettering on one side as a guide to cut straight, and a string line on the other. Doesn’t have to be perfect.
Be careful cutting! Set your saw (or other tool) to the appropriate depth. It would be best to clamp the pipe to something from the inside; this is where you’ll have to use your own judgement.
That’s the slide surface, you’re done with the most difficult cut of the project! Set it aside, now we’ll build the wooden frame. We need
Legs, Feet, and Supports
Three legs were enough for a 12′ rail, so we cut two of the boards up into:
- 3 Legs, 20″ long
- 3 Feet, 24″ long, 30° cuts
- 3 Supports, 12″ long
- 3 triangles (45° cuts) – for attaching the legs
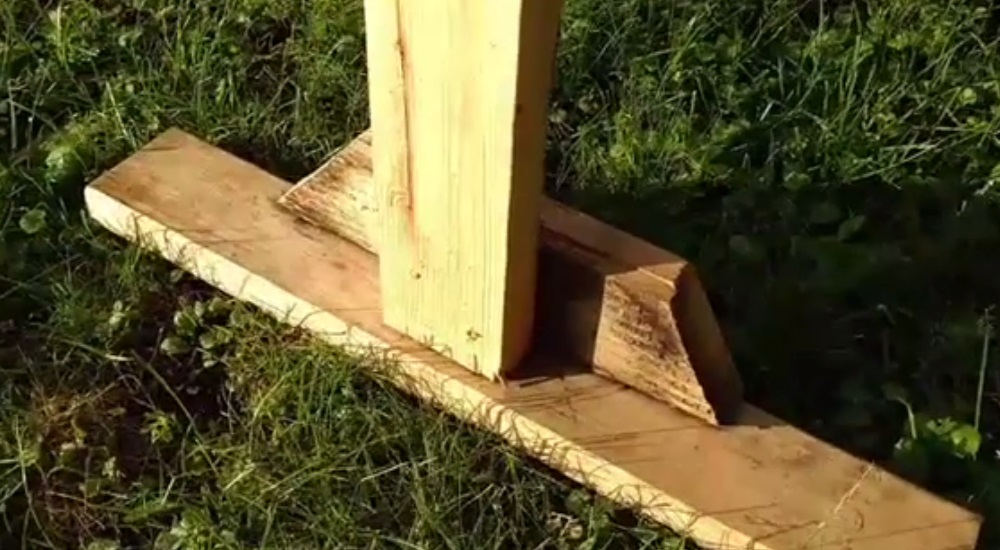
We’ll build the supports first. Put the legs together with the 2 1/2″ screws, using 2 screws between every board.
1) Start by screwing the leg to the foot, through the bottom.
2) Screw the support piece on, through the leg and foot.
Now mark the last 12-foot 2×4 in the center, and around 12 inches in from each end. Screw through the top of the board to attach the legs on those marks.
There’s a reason the legs aren’t at the end. When you jump from or land on the rail, it’s not at the very end; typically it’s a foot or two in. If you’re worried, you can make your triangle braces longer than we did, and the rail will bend even less (next step).
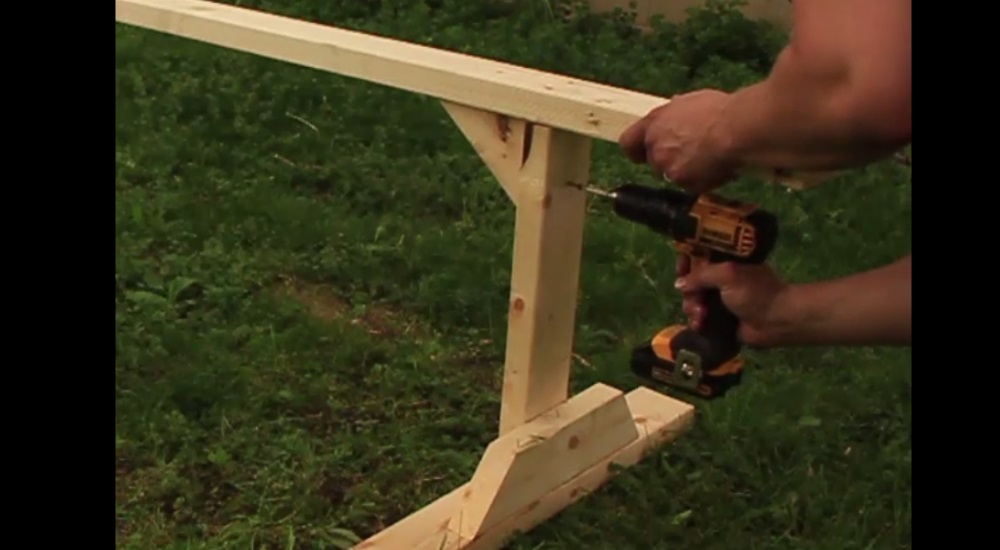
Screw on the triangle braces – through the legs and the top board. These braces provide a lot of support for the legs, and your rail would be significantly weaker without them. Check out that DeWalt 20V. Awesome tool from the combo set, I use it for every single thing I do. Pancakes? Drill. Clogged toilet? Buddy I got a spade bit.
Anyway, these braces are only about 8 inches long. You can make them longer for more support, but the PVC will add some strength so it’s not as necessary at the end.
Attaching the PVC
All we have left is attaching the pipe, which is a bit tricky.
Drill holes for the screws on both sides, about every 18 inches, and within a few inches of the ends.
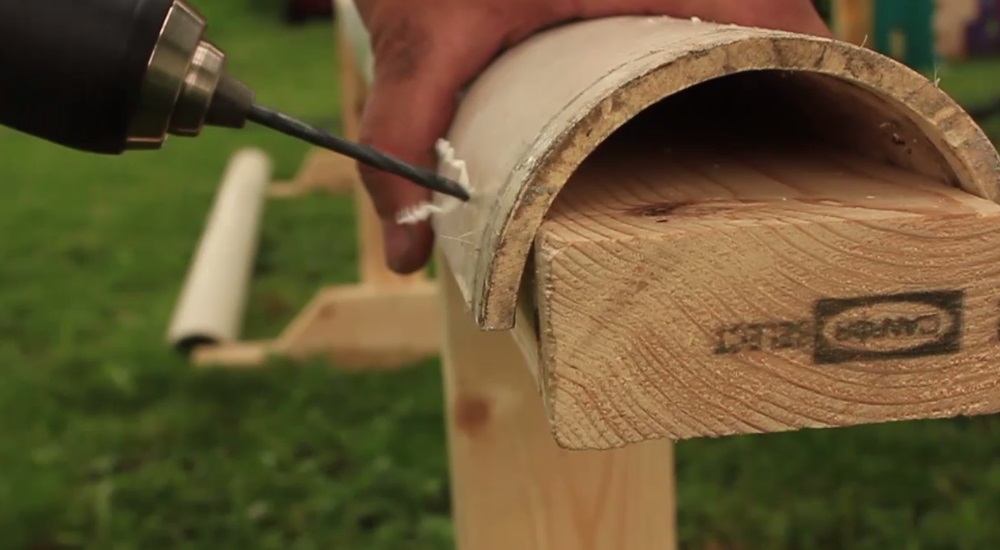
Notice the holes are going in along the top edges of the 2×4. This helps keep the pipe straight, if the screws were directly into the sides of the board, the pipe would be squeezed and might even break.
IMPORTANT: Make sure when you place the second pipe that it’s lower than the first! This will make your rail have a particular direction: place your rail so the higher pipe is at the beginning of the rail, and you’ll fall 1/8-inch onto the second rail. It will hardly be noticeable, much less so than catching an edge from placing the rail backwards.
Lube the rail with a little bit of cooking spray or the most famous summer setup lube, and you’re ready to shred! Read our article on detuning your edges to round off your edges and reduce the risk of digging an edge into the PVC.